Tempo
Tempo1.1
Protein Der Klang let you play and manipulate up to 12 clips on its 3 tracks in a creative way.
Each track is color coded and can be setup to play up to 4 clips at the same time.
When the maximum number of clips playing on a track is reached, triggering an extra clip will stop the oldest.
The user-interface is composed of the navigation bar at the bottom that selects the current module that appears on top.
A module is composed of two rows of buttons on left and right sides and a controller zone at center.
In most cases, the buttons on the right are used to navigate within the different module views, and the buttons on the left to perform actions in combination with the controller zone.
TempoThe Tempo module gives you control on the instrument’s trigger clock and global BPM.
The clock is used to control selected clips trigger timing: the playback starts or stops when the clock hit the top mark. Its update rhythm corresponds to the application’s BPM.
You can control the clock’s beat count by sliding a finger vertically on the left half part of the controller zone.
The BPM can be set from 60 to 240 beats per minute. In addition to controlling the clock speed, it affects effects, tracks timings, and BPM-synchronized clips playback speed.
You can control the BPM by sliding a finger horizontally and vertically on the right half part of the controller zone.
The tap![]() button let you tap in rhythm to change the BPM accordingly, where the metronome
button let you tap in rhythm to change the BPM accordingly, where the metronome ![]() activates the metronome.
activates the metronome.
The accelerometer![]() button let you control the BPM by tilting the device.
button let you control the BPM by tilting the device.
 Clips
ClipsThe clips are organized in 9 resizable banks.
Select the current bank using ![]() on top-right.
on top-right.
Play a clip simply by touching it.
To start a clip instantly, force the Instant trigger mode on all clips by touching the ![]() button.
button.
remark:
Stop a clip by holding the ![]() button then pressing the clip.
button then pressing the clip.
Stop all the clips playing on a track by:
To stop a clip instantly, force the Instant trigger mode on all clips by touching the ![]() button.
button.
Change a clip’s volume by touching the ![]() button on the left then sliding your finger vertically on the clip.
button on the left then sliding your finger vertically on the clip.
Record a new audio sample by touching the ![]() button, then touching the targeted clip.
button, then touching the targeted clip.
You can select the recording source between the device’s audio input ![]() or application’s audio output
or application’s audio output![]() .
.
The recorded samples are copied amongst other user samples. The recording uses the targeted clip current trigger mode (clock or instant).
remark:
You can edit the current bank and its clips by touching the module’s button in the navigation bar.
You can resize the current bank using![]() and
and![]() on the left.
on the left.
You can reset a clip by choosing the ![]() mode before touching the clip.
mode before touching the clip.
You can edit a clip by choosing edit![]() before touching the clip, which will open the Clip Edit view.
before touching the clip, which will open the Clip Edit view.
Load an audio sample by clicking on the![]() button on the left.
button on the left.
You can paste a sample that’s been copied from another application and copy the current sample by clicking on the ![]() button on the left (c.f. Samples & Patches section further in this document).
button on the left (c.f. Samples & Patches section further in this document).
You can test clip’s parameters using the play![]() and stop
and stop ![]() buttons on the left.
buttons on the left.
Each clip has a colour that corresponds to the track it’s assigned to ![]()
![]()
![]() .
.
It can be triggered with the clock![]() or instantly using its track’s quantization
or instantly using its track’s quantization![]() .
.
It has four different trigger modes:
Each clip playback can be synchronized to the patch BPM using the edit view.
There are three playback modes:
You can adjust the clip’s cue point to start it at a time that’s not 0.
You can adjust the clip’s gain boost in case in case it’s too low.


 Tracks
There are 3 color coded track modules in the application.
The Track module let you manipulate the triggered clips playback, and apply an audio effect on their mixed-down signals.
The button in the navigation bar shows the maximum number of clips you can play on the track.
The Scratch view let you scratch the clips using the controller zone.
At any time you can resync![]() the playback as if you didn’t change it since the clips trigger.
the playback as if you didn’t change it since the clips trigger.
Finally you can pause![]() the playback and fade the sound in
the playback and fade the sound in ![]() or out
or out ![]() .
.
The Slicer view let you directly control the clips playback cursor by touching or sliding the controller zone horizontally. As in scratch view you can resync and pause the clips playback using the dedicated buttons.
Finally you can revert the playback using the revert![]() button.
button.
remarks:
The Effect view lets you activate and control the selected effect using the cursor in the controller zone.
You can hold the effect activation by hitting the lock ![]() button.
button.
You can control the effect parameters using the device’s accelerometer using the accelerometer![]() button.
button.
You can edit the track’s properties by touching the module’s button.
You can choose how many clips the track will allow to be launched at the same time.
You can also modify the track’s quantization, that will be used by clips in Instant trigger mode and by the slicer view.
In this view you can change parameters that will be used in the Scratch and Slicer views.
You can choose or remove the effect that will be used on the track.
 Mixer
MixerThe mixer module produces the mixed-down audio signal by letting you control the tracks volume and apply a master effect on it.
The volume view gives you control on each track’s individual control. Slide your finger vertically on the selected track’s volume slider to change its volume gradually. You can also set the volume instantly to a specific position by quickly hitting the slider.
The effect view let you control the mixer’s effect the same way as in the tracks.
You can change and remove the mixer’s effect by touching on the module’s button.
 Application
The Menu module let you manage your patches and provide some help.
The patch view let your manage your patches.
The name of the currently loaded patch appears centered on the controller zone.
You can create a new patch using the ![]() button. A patch can be created blank (“Void”), from one of your own patches or from one of the demo patches.
button. A patch can be created blank (“Void”), from one of your own patches or from one of the demo patches.
You can load an existing patch using the ![]() button.
button.
remarks:
The info view let you consult this![]() manual, send feedback by email
manual, send feedback by email ![]() within the application and display the credits
within the application and display the credits![]() .
.
The samples must be uncompressed 16bit .wav files.
If your samples are marked as “unsupported” in the sample library, open and export them using the free open-source application Audacity http://audacity.sourceforge.net.
A patch uses the .pdk file extension.
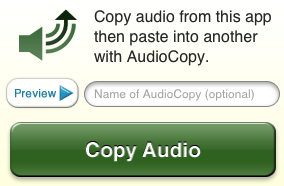
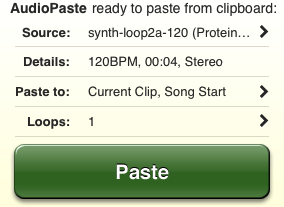
Protein Der Klang uses Sonoma AudioCopy/AudioPaste technology to share uncompressed 16bit .wav audio samples in between applications running on the same device. You can both copy from or paste to an actual clip by editing it and press the audio copy/paste button.
|
|
 Audiobus
Audiobus is a simple yet powerful way to virtually connect audio/musical applications together in a bus.
So far the technology allows several INPUT-compatible applications to send audio into an EFFECT-compatible application that itself sends its output to an OUTPUT-compatible application.
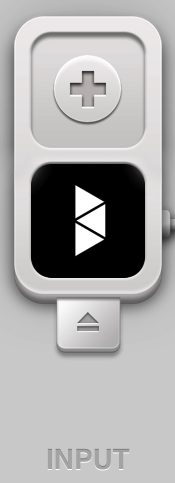
Protein Der Klang acts as an Audiobus INPUT, meaning it becomes a source for another application by sharing its audio output.
Once the Audiobus application’s running, you can select Protein Der Klang as one of the INPUTs.
Depending on the application status, you should either see Protein Der Klang icon is the application’s already running, or a “ZZZ Tap to launch” if it’s not.
You just have to press the icon to switch to Protein Der Klang and activate the Audiobus routing.
Within Protein Der Klang, you’ll then see the Audiobus control panel displayed at the right side of the screen. This panel enables you to switch in between applications and to control some other application-specific features like play, record or activate.
You can hide the panel by sliding the handler on top of the panel to the right side of the screen, and show it again by sliding your finger left starting from the right side of the screen.
Audiobus | Protein Der Klang |
|
|
remarks:
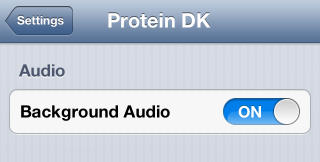
In case you’re not using Audiobus, but you want Protein Der Klang to keep playing when it’s in background and mix its audio-output together with already playing applications, you can activate “Background Audio” in Protein DK section of the iOS device’s settings.

© 2013 Pierre Guilluy